

How Do I Use Rails Ruby Bench?
/How do I do these explorations with Rails Ruby Bench? How could you do them? There’s full source code, but source code is only one piece of the story.
So today, let’s look at that. The most common way I do it is with AWS, so I’m going to describe it that way. Watch this space for a local version in later weeks!
An Experiment
Rails Ruby Bench is a benchmark, which means it’s mostly useful for experiments in the tradition of the scientific method. It exists to answer questions about performance, so it’s important that I have a question in mind. Here’s one: does Ruby’s new compacting GC make a difference in performance currently? I’ve chosen that question partly because it’s subtle - the answer isn’t clear, and Rails Ruby Bench isn’t a perfect tool for exploring it. That means there will be problems, and backtracking, and general difficulties. That’s not the best situation for easy great results, but it’s absolutely perfect for documenting how RRB works. For a benchmark you don’t want to hear about the happy path. You want to hear how to use it when things are normal-or-worse.
My hypothesis is that compacting GC will make a difference in speed but not a large one. Rails Ruby Bench tends to show memory savings as if it were extra speed, and so if compacting GC is doing a good job then it should speed up slightly. I may prove it or not - I don’t know yet, as I write this. And that’s important - you want to follow this little journey when I still don’t know because you’ll be in the same situation if you do this.
(Do I expect you to actually benchmark changes with Rails Ruby Bench? Probably a few of you. But many, many of you will want to do a benchmarking experiment at some point in your career, and those are always uncertain when you’re doing them.)
AWS Setup, Building an Image
RRB’s canonical measurements are always done using AWS. For the last two-ish years, I’ve always used m4.2xlarge dedicated instances. That’s a way to keep me honest about hardware while giving you access to the same thing I use. It does, however, cost money. I’ll understand if you don’t literally spin up new instances and follow along.

Packer starts to build your image via “packer build ami.json”
First you’ll need an image. I already have one built where I can just “git pull” a couple of things and be ready to go. But let’s assume you don’t yet, or you don’t want to use one of my public images. I don’t always keep everything up to date - and even when I do, you shouldn’t 100% trust me to. The glory of open source is that if I screw something up, you can find that out and fix it. If that happens, pull requests are appreciated.
To build an image, first check out the Rails Ruby Bench repo, then cd into the packer directory. You’ll need Packer installed. It’s software to build VM images, such as the AWS Amazon Machine Image you’ll want for Rails Ruby Bench. This lets us control what’s installed and how, a bit like Docker, but without the extra runtime overhead that Docker involves (Docker would, truthfully, be a better choice for RRB if I knew enough about setting it up and also had a canonical hardware setup for final numbers. I know just enough places where it does cause problems that I’m not confident I can get rid of all the ones I don’t know.)
Got Packer installed? Now “packer build ami.json”. This will go through a long series of steps. It will create a small, cheap AWS instance based on one of the standard Ubuntu AMIs, and then install a lot of software that Rails Ruby Bench and/or RSB want to have available at runtime. It will not install every Ruby version you need. We’ll talk about that later.
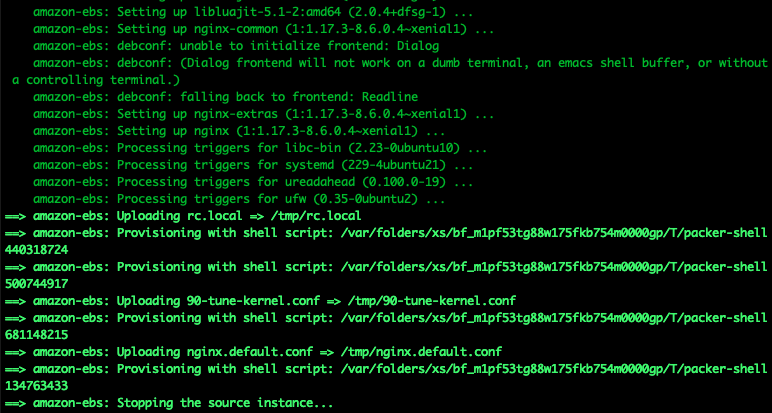
And after around an hour, you have a Packer image. It’ll print the AMI, which you’ll need.
(If you do Packer builds repeatedly you will get transient errors sometimes - a package will fail to download, an old Ubuntu package will be in a broken state, etc. In most cases you can re-run until it works, or wait a day or two. More rarely something is now broken and needs an update.)
If all goes well, you’ll get a finished Packer image. It’ll take in the neighbourhood of an hour but you can re-use the image as often as you like. Mostly you’ll rebuild when the Ubuntu version you’re using gets old enough that it’s hard to install new software, and you find a reason you need to install new software.
An Aside: “Old Enough”
Not every benchmark will have this problem, but Rails Ruby Bench has it in spades: legacy versions. Rails Ruby Bench exists specifically to measure against a baseline of Ruby 2.0.0-p0. Ruby releases a new minor version every Christmas, and so that version of Ruby is about to turn seven years old, or more than five years older than my youngest kid. It is not young software as we measure it, and it’s hard to even get Ruby 2.0 to compile on Mac OS any more.
Similarly, the version of Discourse that I use is quite old and so are all its dependencies. Occasionally I need to do fairly gross code spelunking to get it all working.
If you have ordinary requirements you can avoid this. Today’s article will restrict itself to 2.6- and 2.7-series Ruby versions. But keep in mind that if you want to use RRB for its intended purpose, sometimes you’re going to have an ugly build ahead of you. And if you want to use RRB for modern stuff, you’re going to see a lot of little workarounds everywhere.
If you ask, “why are you using that Ubuntu AMI? It’s pretty old,” the specific answer is “it has an old enough Postgres to be compatible with the ancient Discourse gems, including the Rails version, while it’s new enough that I can install tools I experiment with like Locust.” But the philosophical answer is closer to “I upgrade it occasionally when I have to, but mostly I try to keep it as a simple baseline that nearly never changes.”
In general, Rails Ruby Bench tries not to change because change is a specific negative in a benchmark used as a baseline for performance. But I confess that I’m really looking forward to Christmas of 2020 when Ruby 3x3 gets released and Ruby 2.0 stops being the important baseline to measure against. Then I can drop compatibility with a lot of old gems and libraries.
You’ll also sometimes notice me gratuitously locking things down, such as the version of the Bundler. It’s the same basic idea. I want things to remain as constant as they can. That’s not 100% possible - for instance, Ubuntu will automatically add security fixes to older distributions, so there’s no equivalent of a Gemfile.lock for Ubuntu. They won’t let you install old insecure versions for more compatibility, though you can use an old AMI for a similar result. But where I can, I lock the version of everything to something specific.
Starting an Image
If you built the AMI above then you have an AMI ID. It’ll look something like this: ami-052d56f9c0e718334. In fact, that one’s a public AMI I built that I’m using for this post. If you don’t want to build your own AMI you’re welcome to use mine, though it may be a bit old by the time you need to do this.
If you like the AWS UI more than the AWS command-line tools (they’re both pretty bad), then you can just start an instance in the UI. But in case you prefer the command-line tools, here’s the invocation I use:
aws ec2 run-instances --count 1 --instance-type m4.2xlarge --key-name noah-packer-1 --placement Tenancy=dedicated --image-id ami-052d56f9c0e718334 --tag-specifications 'ResourceType=instance,Tags=[]'
Dismal, isn’t it? I also have a script in the RRB repo to launch instances from my most recent AMI. That’s where this comes from. Also, you’ll need your own keypair since your AWS account doesn’t have a key called noah-packer-1.
You’ll need to look up the IP address for the instance, and eventually you’ll want the instance ID in order to terminate it. I’m going to trust you to do those things - do make sure to terminate the instance. Dedicated m4.2xlarges are expensive!
Exploration
Once you have the AMI and you can in theory start the AMI, it’s time to think about the actual experiment: what does GC compaction do relative to Rails Ruby Bench? And how will we tell?
In this case, we’re going to run a number of Ruby versions with compaction on and off and see how it changes the speed of Rails Ruby Bench, which means running it a lot on different Ruby versions with different compaction settings.
To gather data, you generally need a runner script of some kind. You’re going to be running Rails Ruby Bench many times and it would be silly (and error-prone!) to do it all by hand.
First, here’s a not-amazing runner script of the kind I used for awhile:
#!/bin/bash -l

# Show commands, break on error
set -e
set -x

rvm use 2.6.5
bundle

for i in ; do
  bundle exec ./start.rb -i 10000 -w 1000 -s 0 --no-warm-start -o data/
done

rvm use 2.7.0-preview2
bundle

for i in ; do
  bundle exec ./start.rb -i 10000 -w 1000 -s 0 --no-warm-start -o data/
done
It’s… fine. But it shows you that a runner script doesn’t have to be all that complicated. It runs bash with -l for login so that rvm is available. It makes sure to break on error - modern Ruby doesn’t get a lot of errors in Discourse, but you do want to know if it happens. And then it runs 30 trials each on Ruby 2.6.5 and Ruby 2.7.0-preview2, each with 10,000 HTTP requests and 1,000 warmup (untimed) HTTP requests, with the default number of processes (10) and threads per process (6).
With this runner script you’re better off using a small number of iterations (30 is large-ish) and running it repeatedly. That way a transient slowdown doesn’t look like it’s all a difficulty with the same Ruby. In general, you’re better off running everything multiple times if you can, and I often do. All the statistics in the world won’t stop you from doing something stupid, and reproducing everything is one way to make sure you didn’t do some kinds of stupid things. At least, that’s something I do to reduce the odds of me doing stupid things.
There’s a better runner to start from now in Rails Ruby Bench. The main difference is that it runs all the trials in a random order, which helps with that “transient slowdown” problem. For GC compaction we’ll want to modify it to run with and without GC compaction for Rubies that have it (2.7-series Rubies) and only with no compaction for 2.6-series Rubies. Here’s what the replacement loop for that looks like:
commands = []
RUBIES.each do |ruby|
  TESTS.each_with_index do |test, test_index|
    invocation_wc = "rvm use # && # && export RUBY_RUNNER_TEST_INDEX=# && #"
    invocation_nc = "rvm use # && # && RUBY_RUNNER_TEST_INDEX=# && #"
    if ruby["2.6."]  # Ruby is 2.6-series?
      commands.concat([invocation_nc] * TIMES)
    else
      commands.concat([invocation_nc,invocation_wc] * TIMES)
    end
  end
end
It’s not simple, but it’s not rocket science. The WITH_COMPACT and NO_COMPACT snippets are already in the runner because it’s not necessarily obvious how to do that - I like to keep that kind of thing around too. But in general you may need some kind of setup code for an experiment, so remember to remove it for the runs that shouldn’t have it. In this case, there’s not a “compaction setting” for Ruby proper, we just run GC.compact manually in an initialiser script. So those snippets create or remove the initialiser script.
The compaction snippets also set an environment variable, RUBY_COMPACT=YES (or NO.) That doesn’t do anything directly. Instead, RRB will remember any environment variable that starts with RUBY for the run so you can tell which is which. I might have done an overnight run and messed that up the first time and had to re-do it because I couldn’t tell which data was which… But in general, if an environment variable contains RUBY or GEM, Rails Ruby Bench will assume it might be an important setting and save a copy with the run data.
For each experiment, you’ll want to either change the runner in-place or create a new one. In either case, it’s just a random script.
I also changed the RUBIES variable to include more Rubies. But first I had to install them.
More Rubies
There are two kinds of Ruby versions you’ll sometimes want to test: prebuilt and custom-built. When I’m testing ordinary Ruby versions like 2.6.0, 2.6.5 or 2.7.0-preview2, I’ll generally just install them with RVM after I launch my AWS instance. A simple “rvm install 2.6.5” and we’re up and running. The new runner script will install the right Bundler version (1.17.3) and the right gems to make sure RRB will run properly. That can be important when you’re testing four or five or eight different Ruby versions - it’s easy to forget to “bundle _1.17.3_ install” for each one.
If you want to custom-build Ruby, there’s slightly more to it. The default Packer build creates one head-of-master custom build, but of course that’s from whenever the Packer image was built. You may want one that’s newer or more specific.
You’ll find a copy of the Ruby source in /home/ubuntu/rails_ruby_bench/work/mri-head. You’ll also find, if you run “rvm list”, that there’s an ext-mri-head the same age as that checkout. But let’s talk about how to make another one.
We’re exploring GC compaction today, so I’m interested in specific changes to Ruby’s gc.c. If you check the list of commits that changed the file, there’s a lot there. For today, I’ve chosen a few specific ones: 8e743f, ffd082 and dddf5a. There’s nothing magical about these. They’re changes to gc.c, a reasonable distance apart, that I think might have some kind of influence on Ruby’s speed. I could easily have chosen twenty others - but don’t choose all twenty because the more you choose, the slower testing goes. Also, with GC compaction I know there are some subtle bugs that got fixed so the commits are all fairly recent. I don’t particularly want crashes here if I can avoid them. They’re not complicated to deal with, but they are annoying. Worse, frequent crashes usually mean no useful data since “fast but crashy” means that version of Ruby is effectively unusable. Not every random commit to head-of-master would make a good release.
For each of these commits I follow a simple process. I’ll use 8e743f to demonstrate.
git checkout 8e743f
mkdir -p /home/ubuntu/ruby_install/8e743f
./configure —prefix=/home/ubuntu/ruby_install/8e743f (you may need to autoconf first so that ./configure is available)
make clean (in case you’re doing this multiple times)
make && make install
rvm mount -n mri-pre-8e743f /home/ubuntu/ruby_install/8e743f
You could certainly make a script for this, though I don’t currently install one to the Packer image.
And then you’ll need to use these once you’ve built them. Here’s what the top of my runner script looks like:
RUBIES = [
  "2.6.0",
  "2.6.5",
  "ext-mri-head",  # Since I have it sitting around
  "ext-mri-pre-8e743f",
  "ext-mri-pre-ffd082",
  "ext-mri-pre-dddf5a",
]
Nothing complicated in RUBIES, though notice that rvm tacks on an “ext-” on the front of mounted Rubies’ names.
How Does It Run?
If all goes well, the next part is underwhelming. Now we actually run it. I’m assuming you’ve done all the prior setup - you have an instance running with Rubies installed, you have a runner script and so on.
First off, you can just run the runner from the command line, something like “./runner.rb”. In fact I’d highly recommend you do that first, possibly set with only an iteration or two of each configuration, just to make sure everything is working fine. If you have a Ruby installation that doesn’t work or a Rails version not working with a gem you added or a typo in code somewhere, you want to find that out before you leave it alone for eight hours to churn. In RRB’s runner you can change TIMES from 30 down to something reasonable like 2 (why not 1? I sometimes get config bugs after some piece of configuration is done, so 2 iterations is a bit safer.)
If it works, great! Now you can set TIMES back to something higher. If it doesn’t, now you have something to fix.
You can decide whether to keep the data around from that first few iterations - I usually don’t. If you want to get rid of it then delete /home/ubuntu/rails_ruby_bench/data/*.json so that it doesn’t wind up mixed with your other data.
You can just run the runner from the command line, and it will usually work fine. But if you’re worried about network latency or dropouts (my residential DSL isn’t amazing) then there’s a better way.
Instead, you can run “nohup ./runner &”. That tells the shell not to kill your processes if your network connection goes away. It also says to run it in the background, which is a good thing. All the output will go into a file called nohup.out.
If you need to check progress occasionally, you can run “tail -f nohup.out” to show the output as it gets printed. And doing a quick “ls /home/ubuntu/rails_ruby_bench/data/*.json | wc -l” will tell you how many data files have completed. Keep in mind that the runner scripts and RRB itself are designed to crash if anything goes wrong - silent failure is not your friend when you collect benchmark data. But an error like that will generally be in the log.
Processing the Result
# A cut-down version of the JSON raw data format
{
  "version": 3,
  "settings": {
    "startup_iters": 0,
    "random_seed": 16541799507913229037,
    "worker_iterations": 10000,
    (More settings...)
  },
  "environment": {
    "RUBY_VERSION": "2.7.0",
    "RUBY_DESCRIPTION": "ruby 2.7.0dev (2019-11-22T20:42:24Z v2_7_0_preview3~5 8e743fad4e) [x86_64-linux]",
    "rvm current": "ext-mri-pre-8e743f",
    "rails_ruby_bench git sha": "1bba9dbeaa1e02684d8c2ca8a8f9100c90506d5c\n",
    "ec2 instance id": "i-0cf628df3200d5ad5",
    "ec2 instance type": "m4.2xlarge",
    "env-GEM_HOME": "/home/ubuntu/.rvm/gems/ext-mri-pre-8e743f",
    "env-MY_RUBY_HOME": "/home/ubuntu/.rvm/rubies/ext-mri-pre-8e743f",
    "env-rvm_ruby_string": "ext-mri-pre-8e743f",
    "env-RUBY_VERSION": "ext-mri-pre-8e743f",
    "env-RUBYOPT": "-rbundler/setup",
    "env-RUBYLIB": "/home/ubuntu/.rvm/gems/ext-mri-pre-8e743f/gems/bundler-1.17.3/lib",
    (More settings...)
  },
  "warmup": {
    "times": [
      [
        0.177898031,
        0.522202063,
        0.706261902,
        0.372002397,
If you’ve done everything so far, now you have a lot of large JSON files full of data. They’re pretty straightforward, but it’s still easier to use a processing script to deal with them. You’d need a lot of quality time with a calculator to do it by hand!
I do this a lot, so there’s a data-processing script in the Rails Ruby Bench repo that can help you.
First, copy your data off the AWS instance to somewhere cheaper. If you’re done with the instance, this is a decent time to terminate it. Then, copy the RRB script called process.rb to somewhere nearby. You can see this same setup repeatedly in my repository of RRB data. I also have a tendency to copy graphing code into the same place. Copying, not linking, means that the version of the data-processing script is preserved, warts and all, so I know later if something was screwed up with it. The code is small and the data is huge so it’s not a storage problem.
Now, figure out how you’re going to divide up the data. For instance, for this experiment we care which version of Ruby and whether we’re compacting. We can’t use the RUBY_VERSION string because all those pre-2.7.0 Rubies say they’re 2.7.0. But we can use ‘rvm current’ since they’re all mounted separately by RVM.
I handle environment variables by prefixing them with “env” - that way there can’t be a conflict between RUBY_VERSION, which is a constant that I save, with an environment variable of the same name.
The processing script takes a lot of data, divides it into “cohorts”, and then shows information for each cohort. In this case, the cohorts will be divided by “rvm current” and “env-RUBY_COMPACT”. To make the process.rb script do that, you’d run “process.rb -c ‘rvm current,env-RUBY_COMPACT’”.
It will then print out a lot of chunks of text to the console while writing roughly the same thing to another JSON file. For instance, here’s what it printed about one of them for me:
Cohort: rvm current: ext-mri-pre-8e743f, env-RUBY_COMPACT: YES, # of data points: 600000 http / 0 startup, full runs: 60
   0%ile: 0.00542679
   1%ile: 0.01045952148
   5%ile: 0.0147234587
  10%ile: 0.0193235859
  50%ile: 0.1217705375
  90%ile: 0.34202113749999996
  95%ile: 0.4023132304000004
  99%ile: 0.53301011523
  100%ile: 1.316529161
--
  Overall thread completion times:
   0%ile: 44.14102196700001
  10%ile: 49.34424536089996
  50%ile: 51.769418454499984
  90%ile: 54.03600075760001
  100%ile: 56.40413652299999
--
  Throughput in reqs/sec for each full run:
  Mean: 187.45566524151448 Median: 188.96162032049574 Variance: 16.072435858651925
  [177.2919614844611, 178.24351344183614, 180.07540051803122, 180.3893011741887, 180.64734390789422, 180.78633357692414, 180.9370756562659, 181.48759316874003, 181.50042200695788, 181.7831931840077, 181.82136366559922, 182.42668523798133, 182.9695378281489, 183.4271937021401, 183.69630166389499, 185.39624590894704, 186.6188358046953, 186.72653137536867, 187.41516559992874, 187.44972315610178, 187.79211195172797, 188.03560095362238, 188.04550491676113, 188.16079648567523, 188.47720218882668, 188.57493052728336, 188.77093032659823, 188.7810661284267, 188.82632914724448, 188.9600070136181, 188.96323362737334, 189.05603777953803, 189.07694018310067, 189.09085709051078, 189.3054218996176, 189.42953673775793, 189.67879103436863, 189.68938987320993, 189.70449808150627, 189.7789255152989, 189.79846786458847, 189.89027249507834, 189.90364836070546, 189.98443889440762, 190.0304216448691, 190.2516551068254, 190.43172176734097, 190.51420115472305, 190.56095325134356, 190.56496123229778, 190.70854487422903, 190.7499088018249, 190.94577669990025, 191.0250241857314, 191.2679317071894, 191.39842651014004, 191.44203815980674, 191.94534584952945, 193.16205400859081, 193.47628839756382]

--
  Startup times for this cohort:
  Mean: nil Median: nil Variance: nil
What you see there is the cohort for Ruby 8e743f with compaction turned on. I ran start.rb sixty times in that configuration (two batches of 30, random order), which gave 600,000 data points (HTTP requests.) It prints what cohort it is in (the values of “rvm current” and “env-RUBY_COMPACT”). If your window is wide enough you can see that it prints the number of full runs (60) and the number of startups (0). If you check the command lines up above we told it zero startup iterations, so that makes sense.
The top batch of percentiles are for individual HTTP requests, ranging from about 0.005 seconds to around half a second for very slow requests, to 1.3 seconds for one specific very slow request (the 100th-percentile request.) The next batch of percentiles are called “thread completion times” are because the load tester divides the 10,000 requests into buckets and runs them through in parallel - in this case, each load-tester is running with 30 threads, so that’s about 333 consecutive requests each, normally taking in the neighbourhood of 52 seconds for the whole bunch.
You can also just treat it as one giant 10,000-request batch and time it end-to-end. If you do that you get the “throughput in reqs/sec for each full run” above. Since that happened 60 times, you can take a mean or median for all 60. Data from Rails Ruby Bench generally has a normal-ish distribution, resulting in the mean and median being pretty close together - 187.5 versus 189.0 is pretty close, particularly with a variance of around 16 (which means the standard deviation is close to 4, since standard deviation is the square root of variance.)
If you don’t believe me about it being normal-ish, or you just want to check if a particular run was weird, you’ll also get all the full-run times printed out one after the other. That’s sixty of them in this case, so I expect they run off the right side of your screen.
All this information and more also goes into a big JSON file called process_output.json, which is what I use for graphing. But just for eyeballing quickly, I find process.rb’s console output to be easier to skim. For instance, the process_output.json for all of this (ten cohorts including compaction and no-compaction) runs to about six million lines of JSON text and includes the timing of all 600,000 HTTP requests by cohort, among other things. Great for graphing, lousy for quick skimming.
But What’s the Answer?
I said I didn’t know the answer when I started writing this post - and I didn’t. But I also implied that I’d find it out, and I’ve clearly run 600,000 HTTP requests’ worth of data gathering. So what did I find?
Um… That the real memory compaction is the friends we made along the way?
After running all of this for a couple of days, the short answer is “nothing of statistical significance.” I still see Ruby 2.6.5 being a bit slower than 2.6.0, like before, but close enough that it’s hard to be sure - it’s within about two standard deviations. But the 2.7.0 prereleases are slightly faster than 2.6. And turning compaction on or off makes essentially no difference whatsoever. I’d need to run at least ten times as many samples as this to see statistical significance in these thresholds. So if there’s a difference between 2.7 Rubies, or with compaction, at all, it’s quite small.
And that, alas, is the most important lesson in this whole long post. When you don’t get statistical significance, and you’ve checked that you did actually change the settings (I did), the answer is “stop digging.” You can run more samples (notice that I told you to use 30 times and I gave data for 60 times?). You can check the data files (notice that I mentioned throwing away an old run that was wrong?) But in the end, you need to expect “no result” as a frequent answer. I have started many articles like this, gotten “no result” and then either changed direction or thrown them away.
But today I was writing about how to use the tools! And so I get a publishable article anyway. Alas, that trick only works once.
If you say to yourself, “self, this seems like a lot of data to throw away,” you’re not wrong. Keep in mind that there are many tricks that would let you see little or no difference with a small run before doing something large like this. Usually you should look for promising results in small sets and only then reproduce them as a larger study. There are whole fields of study around how to do studies and experiments.
But today I was showing you the tools. And not infrequently, this is what happens. And so today, this is what you see.
Does this mean Ruby memory compaction doesn’t help or doesn’t work? Nope. It means that any memory it saves isn’t enough to show a speed difference in Rails Ruby Bench — but that’s not really what memory compaction is for, even if I wanted to know the result.
Memory compaction solves a weird failure case in Ruby where a single Ruby object can keep a whole page from being freed, resulting in high memory usage for no reason… But Rails Ruby Bench doesn’t hit that problem, so it doesn’t show that case. Basically, memory compaction is still useful in the failure cases it was designed for, even if Rails Ruby Bench is already in pretty good shape for memory density.